Learn from the Best
The Best in Blogging series gives you proven strategies from top industry experts.
This top-requested feature is blowing up. Want to DIY it? As always, we’ve got your back. We’ve implemented this on our client sites using a variety of methods and we’re going to share some tips to help you either get started or level up on your own site.
There are already some great tutorials out there
- WPTechs explains how to use form plugins to send a link back to the post.
- CultivateWP goes a step further and uses ConvertKit to send the post link.
- Hubbub released a new feature that removes these complicated tutorials and does (most of) it for you!!
We’ve used all of these options and more. I don’t know if Matt Molen has a tutorial, but his solution skips the form plugin by adding some custom code. We’ve worked with that method, too. The one thing we haven’t done is work with Flodesk… but I hear Grayson of iMark Interactive has that covered. So maybe we’ll see a tutorial from him soon, too?
Here’s where this tutorial differs
We’re going to show you:
- A way to send the recipe ingredients and instructions in the email–and explain why you’d want to. (Spoiler: TRUST)
- The easiest & most advanced way to insert the form exactly where you want it. (Spoiler: it’s a FREE plugin)
- There are already some great tutorials out there
- Here’s where this tutorial differs
- How to include recipe ingredients & instructions in your emails
- How to automatically insert “save this recipe” forms
- Questions? Hot tips? Let us know!
- Update History:
How to include recipe ingredients & instructions in your emails
The problem with the current “save this recipe” implementation is that it advertises something it doesn’t deliver: the actual recipe. We’re seeing it convert because it’s new, but if readers are expecting something they don’t receive, we’ll lose their trust and diminish the impact of this feature.
Build trust: email the basic parts of the recipe with a call to action
To do this, we’re doing to specifically use WP Recipe Maker with WPForms (and a custom smart tag). You may be able to modify our code a little to work with other form plugins, but we haven’t tested it.
Update! You can now use our Form Tags for Recipes plugin to skip this process!! Use this with Hubbub or the easiest set-up ever.
Step 1: Follow the WPTechs tutorial using WPForms
I won’t re-write this bit: you can follow Thane’s article (up until the “Setup Email Notification (the “saved post” email)” heading) while using WPForms.
Step 2: Paste this custom code into a safe plugin
Before we set up our notification, we’re going to create a way to get & include some recipe details.
- Install a plugin like Code Snippets or WPCode.
- Create a snippet and paste this into it:
Step 3: Create a notification with the smart tag & add a CTA
When setting up your notification, use our new smart tag wherever you want the recipe info.
{recipe}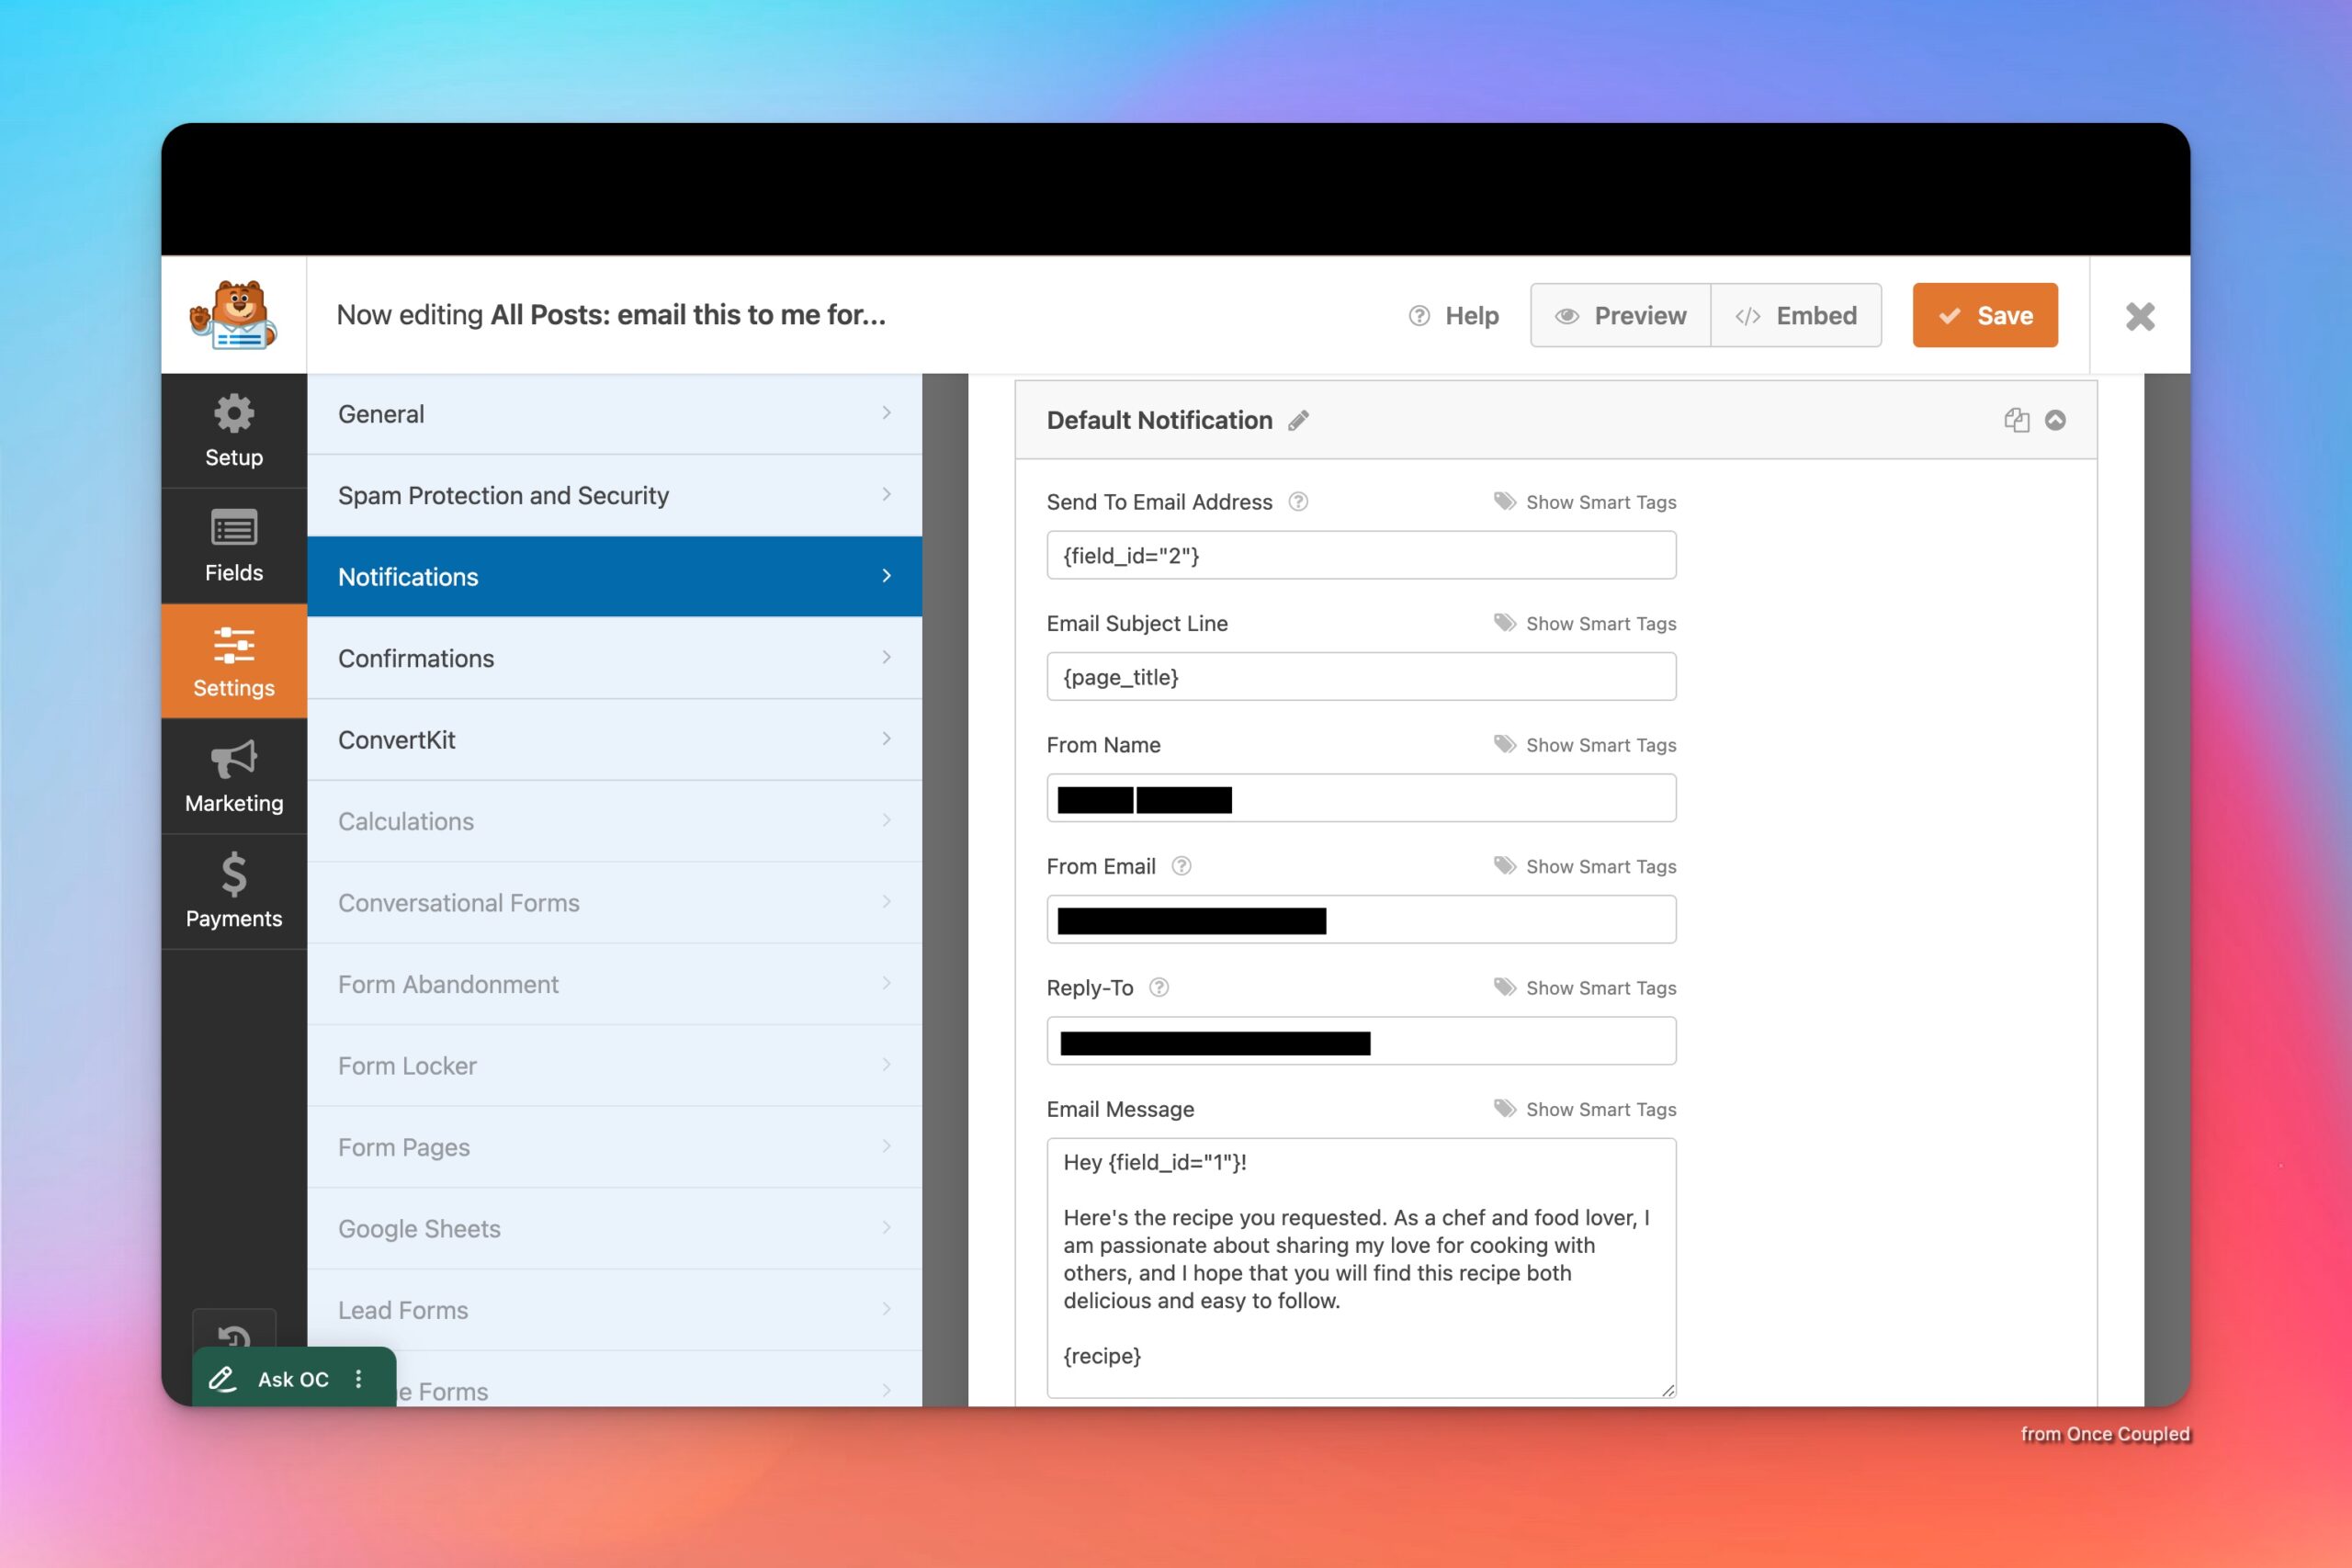
We do want users to come back to your site, so make sure that you also include text reminding them one or more of the following:
- To visit the post for step-by-step photos, FAQs, and chef’s tips.
- They can print the full recipe card (including timings and notes) from the post.
- If they have questions, you encourage comments–that will help others, too.
- That you’d love for them to forward this recipe to a friend.
- You love five-star reviews. 😉
Step 4: insert, test & make live!
Make sure that you test your form. If you’re having trouble with sending or emails going to spam, you may need to install a plugin like WP Mail SMTP by WPForms.
How to automatically insert “save this recipe” forms
For everyone using the block editor… you’re going to love this. This one isn’t dependent on a specific tutorial. You can use any setup with this, including inserting a form directly from ConvertKit.
We recommend using Automatic Block Inserter
The benefits of this are that it’s:
- Super easy
- Really powerful
- Often easier to style
- Available with a free version
Step 1: Install Automatic Block Inserter from Small Plugins
Automatic Block Inserter is a free plugin is available from the WordPress repository. It’s created by our sister brand, Small Plugins, and has been so helpful for many of our clients. You’re gonna dig this!
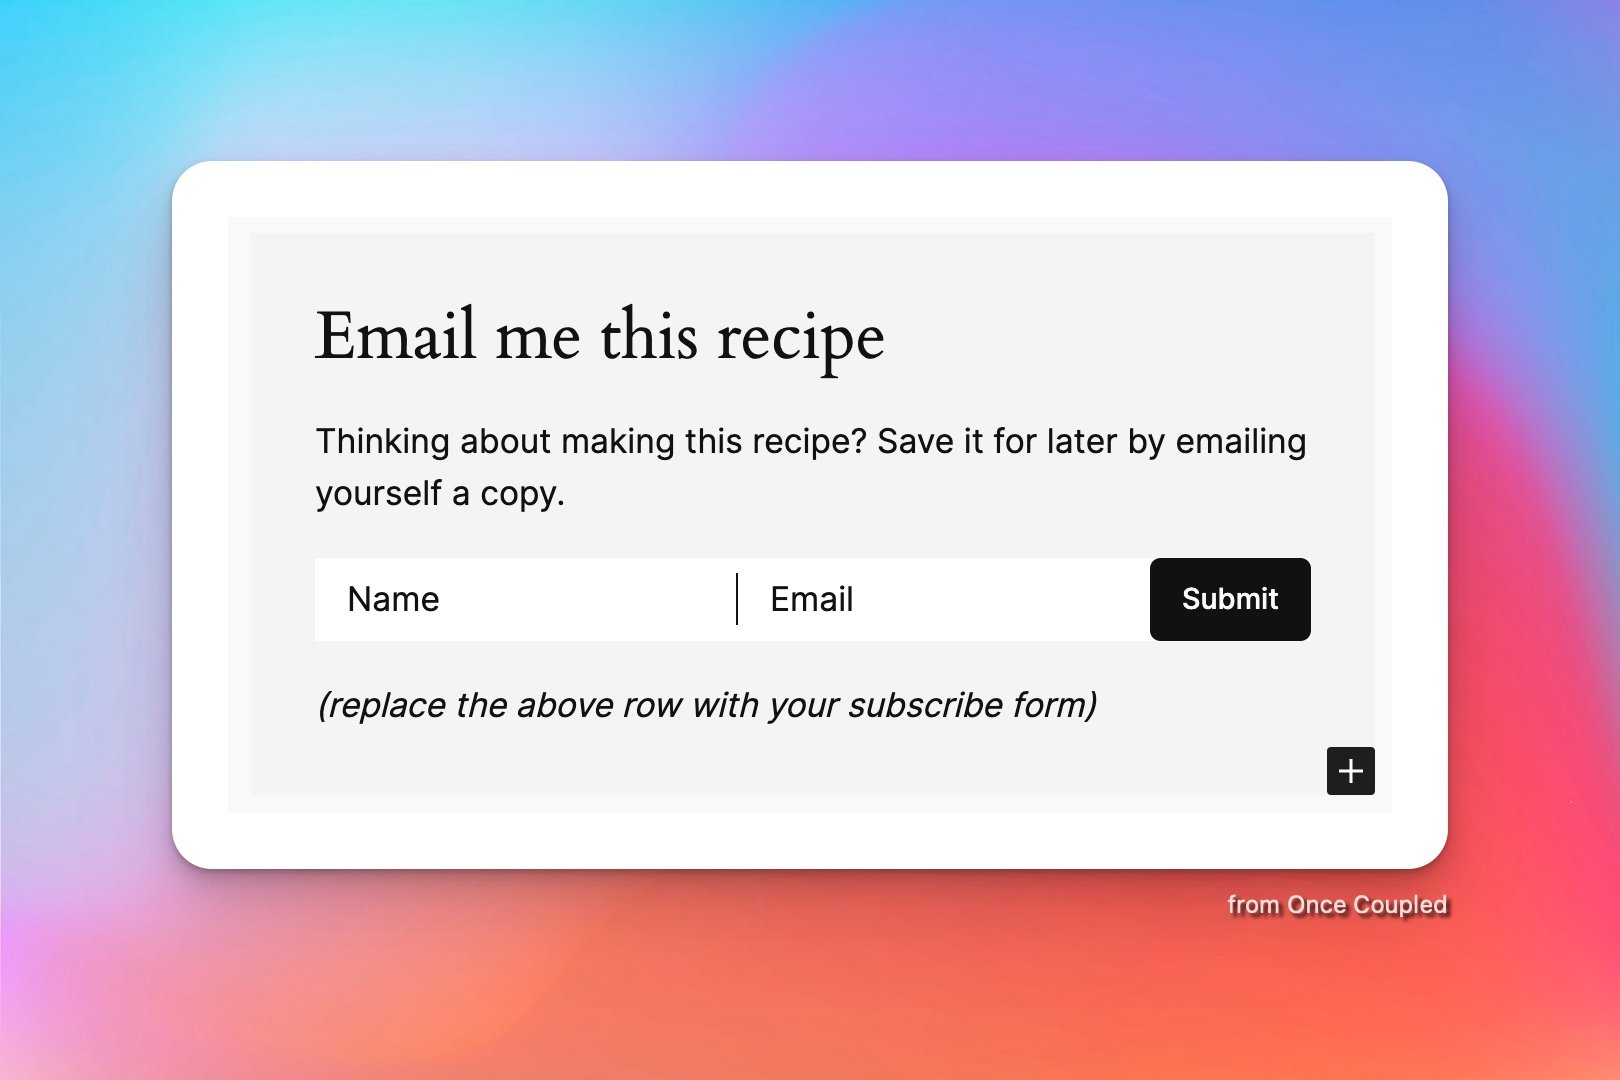
Step 2: Create a block with your form
Once installed, go ahead and make a pretty block for your form. This is a step many tutorials skip, but if you’re using any sort of theme that supports modern block options through WordPress, here’s some code you can paste in to get you started:
After you’ve inserted this code, remember to replace the second half of the content (the fake form and the note in parentheses) with (a) your form plugin’s block or shortcode or (b) your email provider’s form embed HTML code.
Here’s an example of how it might look. This is using the theme Twenty Twenty Four. Your block will inherit fonts and spacing from your theme.
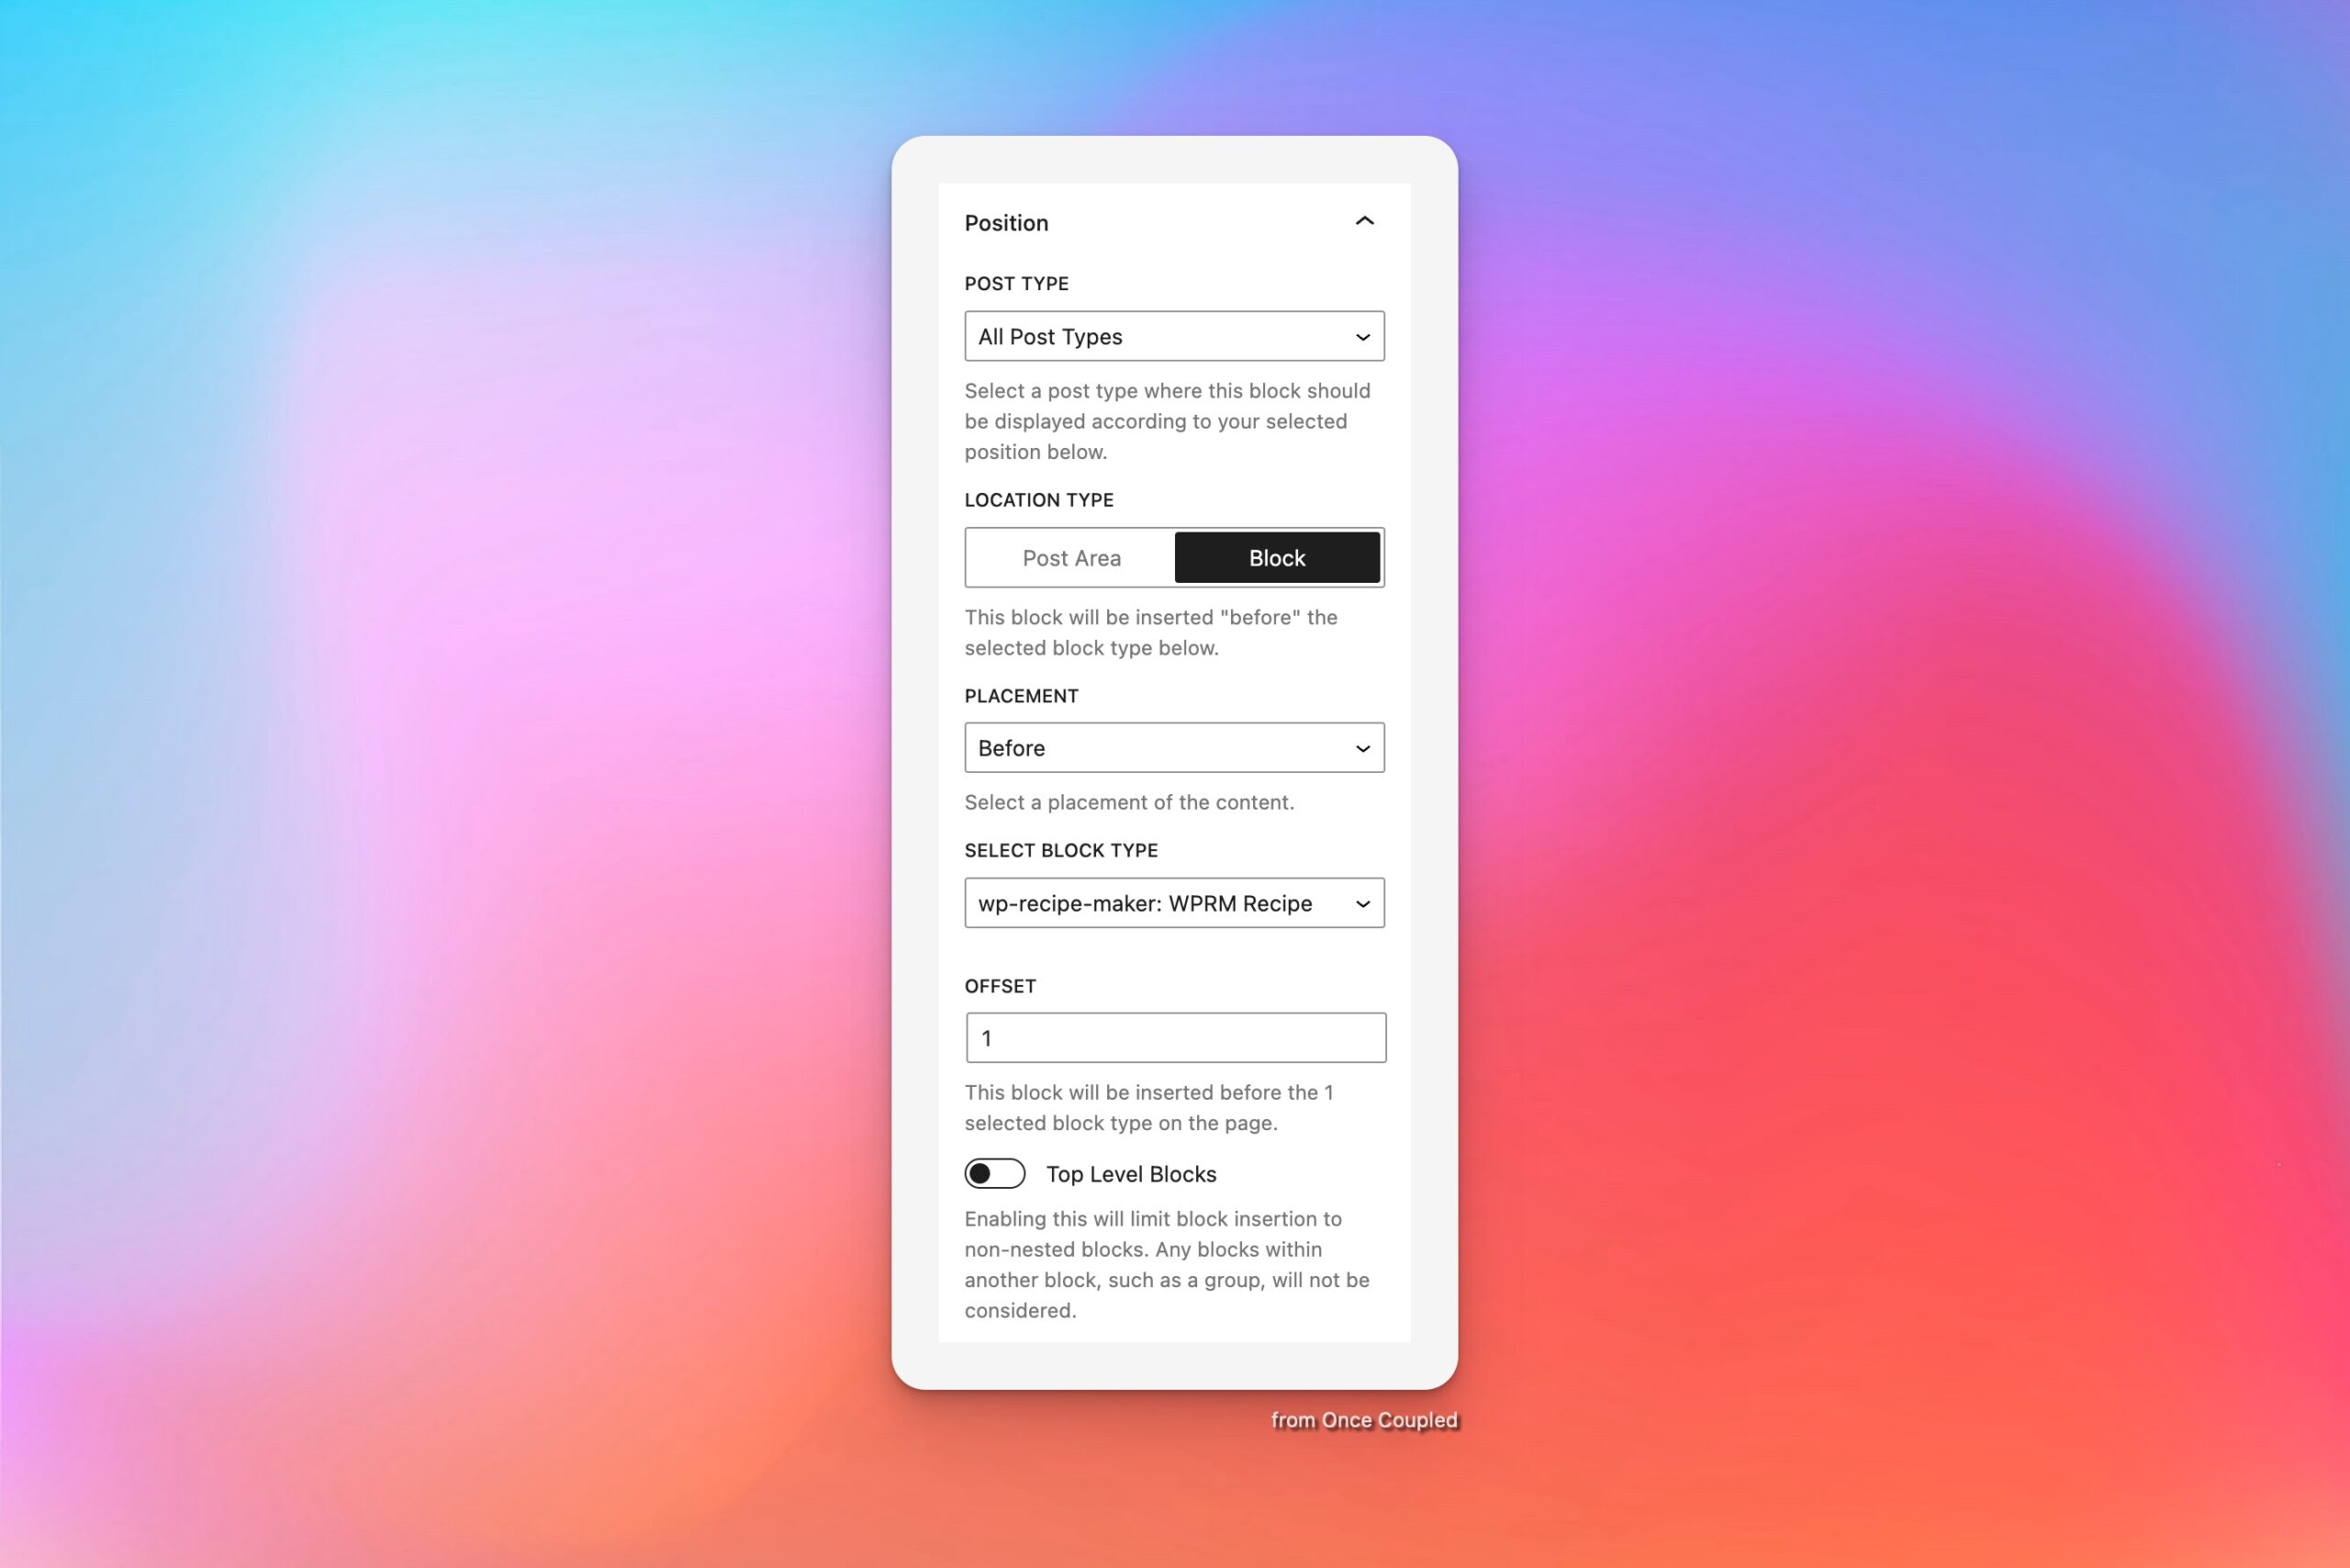
Step 3: Auto-insert said block site-wide
Now for the fun part. This plugin makes it possible to insert your block before or after any core block.

Your post needs to be using the block editor for this to work.
Sorry to my friends that have old posts in the Classic editor: this block won’t be inserted on those. (And is a great sign that it’s time to spend a little time embracing these modern features!) You’ll need to stick with the “post area” option which will add the block before or after all of your content (not within your content).
How to limit “save this recipe” to recipes
What we’re showing you here is how to limit the “save this recipe” block to recipe cards.
If your site has how-to cards, the block will still be inserted above those (see below if you also need to solve that little problem).
Step 1: Purchase & install Automatic Block Inserter Pro
For this, you’ll need the PRO version of Automatic Block Inserter. (If you’re using the block editor extensively, you’re going to love this plugin and the additional features.)
Step 2: Insert your block directly before or after the recipe card
Now we can insert our content before/after blocks from plugins. This means we can add our block directly before the recipe card. Now, if a post doesn’t have a recipe card then nothing will be inserted. Easy!
Questions? Hot tips? Let us know!
Update History:
- 2024/08/02
- Mention Hubbub’s new ‘save this’ feature
- Highlight new ‘Form Tags for Recipes’ from Small Plugins
- 2024/08/19
- Clarify “Step 2: Create a block with your form”

Leave a Reply