I know we don’t all have the resources to use the programs we hear are “the best,” but if you’re one of those people with access to Illustrator and you’re not taking advantage of it, this is for you: an introduction to Illustrator plus some resources to get you started! (I know a bunch of people have installed “borrowed” copies of CS6, you can’t fool me!) (Plus, for $50/yr – or just $4/mo – you can get it via Creative Cloud.)
Why should you use Illustrator?
Working with Illustrator is working with vectors – which just means your content is easy to edit and scalable. I love to see clients who have their important assets made in Illustrator. It means we can easily make edits to their existing branding without having to completely recreate it, or we can produce a much larger version without loss of quality.
Logos are, in my opinion, the most important asset to have made in Illustrator, as you want to use this content everywhere to brand your site, which may involve minimal adjustments to it and a variety of sizes. When you’re hiring a graphic designer, be sure to ask what format your file will come in, and for a copy of both your exported and raw files. (It doesn’t hurt to ask for a text document containing font names and color codes that were used, by the way.)
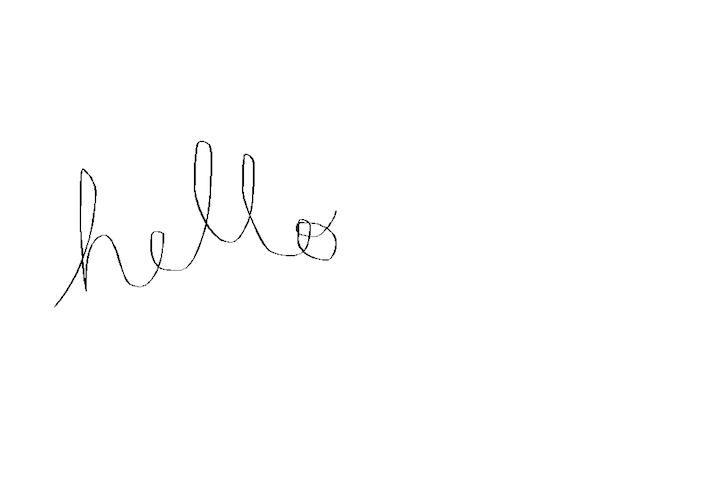
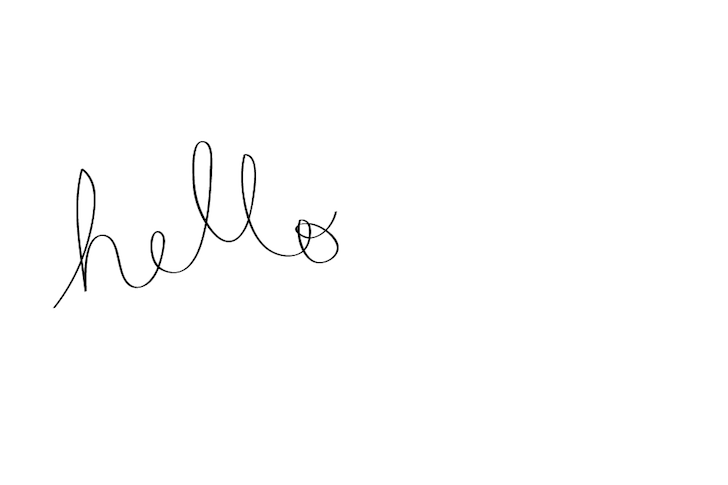
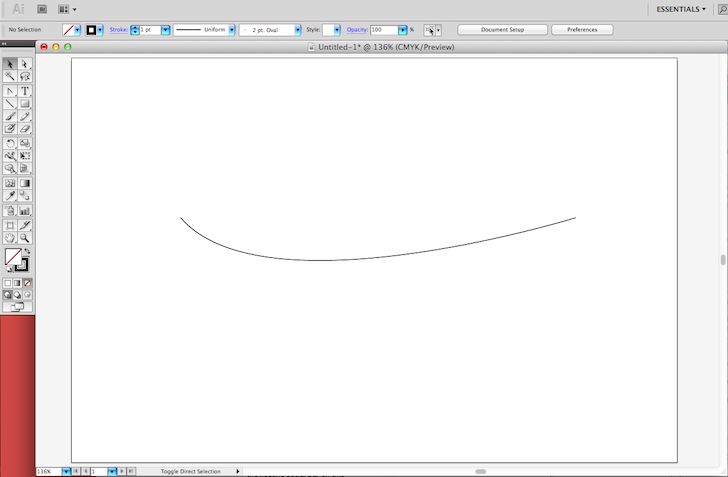
Below is an example of how Illustrator softens your raw drawings into curves:
“How do I use Illustrator?”
There are a LOT of tutorials out there for Illustrator, so I’m just going to introduce you to the interface here. After this, you should be able to follow the beginner tutorials pretty well, and start to get a grip on the program yourself. 🙂
The main work area is our artboard, and we can have many of these for each document (useful because you can use the “export” option with checkbox “use artboards” to easily save multiple designs as once). At the left is our tool area used to create objects, and the right contains different panel groups used to style our objects. Options for each object are the the top of the screen in our control panel. Knowing these main areas will make you familiar enough with Illustrator to follow along most online tutorials!
A quick example:
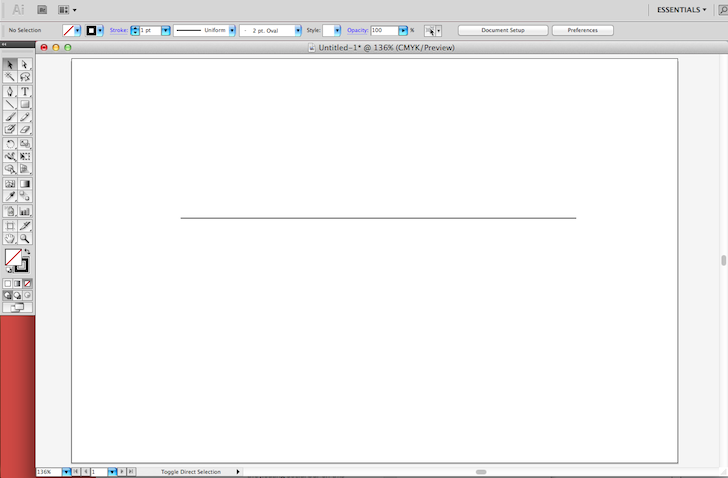
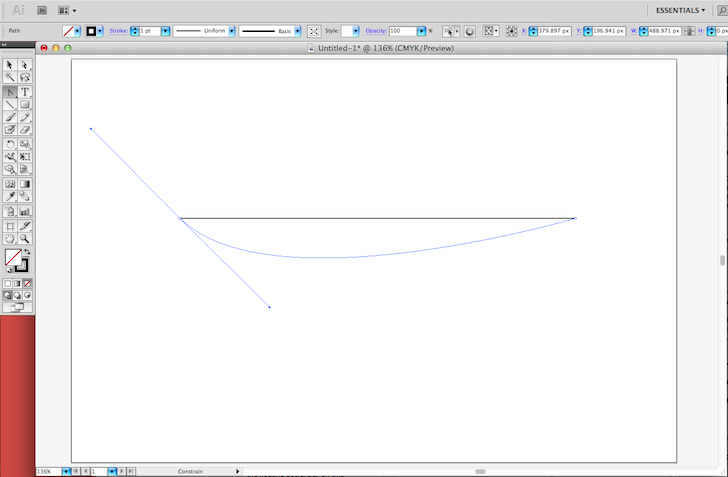
Here’s a quick example of one feature you can use in Illustrator, which I’ll go more in depth on another day. If we choose our line tool and hold shift, we can create a perfectly straight line.
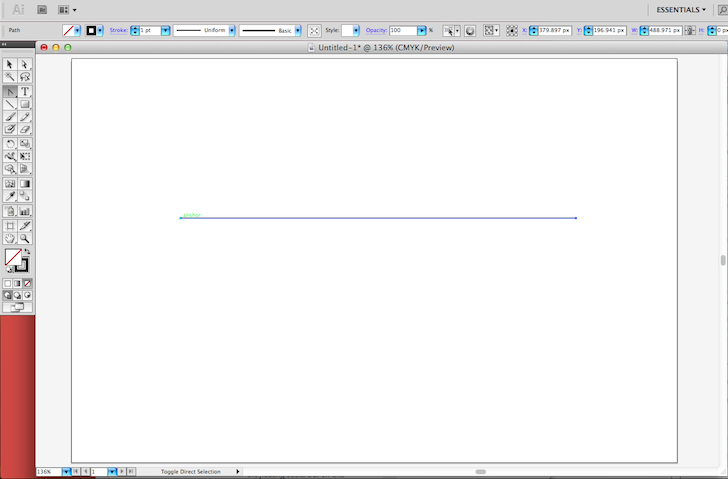
Now, if we want to make this into a curve, we’ll select our “convert anchor point” tool by either using the shortcut (cmd +shift + C) or holding down the pen tool icon until other options appear.
Click on an end point and hold, then move your mouse.
Release and you have a curve! Sure, this doesn’t look entirely useful right now, but as I mentioned earlier, I’ll show you a more practical use for this another day! 🙂
Resources for Illustrator?
If you simply google “Illustrator Tutorials” you’ll find a lot of sites that list multiple Illustrator tutorials. Here’s a tip though, Illustrator has a lot of great resources available for download, that are easily editable and make creating your own work so much easier, as you can combine these resources to make your simple design look detailed.
Free Vectors: http://www.vecteezy.com/
Free Vectors: http://www.freepik.com/popular-vectors
Shape Tutorials: http://vandelaydesign.com/blog/design/illustrator-shapes-tutorials/
Free Brushes: http://www.noupe.com/illustrator/a-huge-compilation-of-80-free-illustrator-brush-sets.html
Brush Tutorials: http://design.tutsplus.com/articles/25-best-of-how-to-in-illustrator-brush-tutorials–vector-4522
My Favorite: http://www.deviantart.com/?q=illustrator+brushes also try searching “illustrator shapes”
Look out for more on Illustrator basics, and ask me for help if you want to learn more!

In 2024 we launched new plugin solutions & a templated theme. These tools offer custom development, easier editing & tech optimizations accessible to bloggers of all sizes.



Leave a Reply