Learn from the Best
The Best in Blogging series gives you proven strategies from top industry experts.
Targeting your content to certain readers can increase click through rates and reader retention. With MailChimp, you can do this with a feature called interest groups. These groups may be something functional like letting your readers choose if they want daily emails or weekly emails, or categorical like finding out what topics your readers are most interested in and sending them more information about that. By catering to your readers, you build rapport and trust – not to mention you keep them coming back for more of exactly what they’re interested in!
How interest groups work
When someone signs up for your newsletter, they’re adding their name to your list. This general list will receive all emails that you direct at it. MailChimp provides for list segmentation based on a number of demographics, but they don’t know what you readers preferences are. These are like sub-lists that your readers are on. Your readers may be in no interest groups or in multiple interest groups, but they’re at least on your main list.
So if you’re running a food blog, you may give your readers the choice to receive updates about “appetizers,” “main courses,” and/or “desserts.” When they sign up for your newsletter, they’re put on your list and into none, some, or all of these groups, based on their decision. Then, when you send out a campaign, such as your main newsletter, you’ll send it to your entire list – but if you want to tell your readers about a really popular dessert post, you can choose to send that campaign to only those who have told you they are interested in said topic. Do you see how this can really help you connect with your readers?
Setting up interest groups
Interest groups aren’t automatically created with your MailChimp list. You need to create your own, custom groups based on your readers.
- Log in to MailChimp
- Click “Lists”
- Choose the list you want to add interest groups to
- Go to “Signup forms”
- Next, “General forms”
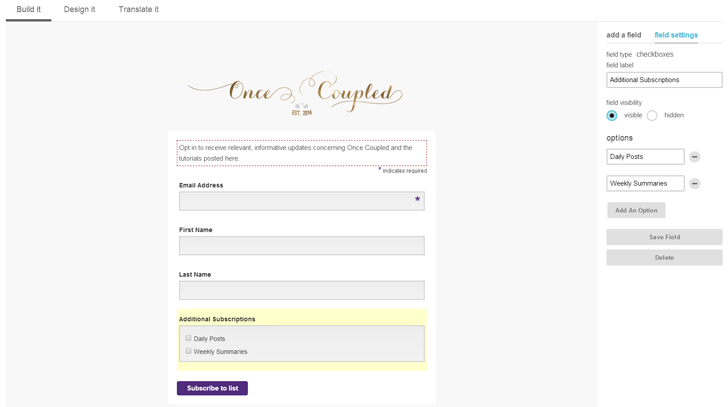
- In the “Build it” platform under “add a field” choose “Check Boxes”
- Give this field a name and add as many options as you see fit. For the purpose of our example, add “Daily Posts” and another “Weekly Summary”
- Save field
Adding the hidden fields to your form

Now that we have MailChimp set up, we can follow the tutorial from last Monday for setting up eNews Extended: go to “Embedded forms” and get your unique form action url. Then place “EMAIL,” “FNAME,” and “LNAME” in the appropriate fields. (MailChimp specific instructions.)
This time though, we want to find the new check box code and put that within the “Hidden Fields” section, as well. Remove the “ul” and “li” tags, we don’t need them. We just need the “input” and the “label”.
If you want to be sure that your new subscribers are signing up for one of these groups, just add a little piece of code: After the word input add check=”checked” to automatically turn on one of the check marks. Note that readers do not have to choose an interest group to be part of your newsletter. You may have plenty of readers who are just interested in getting your general emails without any specific content.
Now save and check out your site.
Adding styles if necessary
You should see your new options, great! However, some themes have styles that mess up the appearance of our added check boxes. If your theme does this, continue on:
HTML
Add a div wrap around each input, like so:
<div class="segment">[INSERT_FIRST_OPTION_CODE_HERE]</div>
CSS
Then, style that div and the inputs within. Here’s the code I have needed to use in the past, though yours may differ:
.enews-widget .segment {
     margin-bottom: 7px;
}
.enews-widget input[type="checkbox"] {
     width: auto;
     display: inline;
}
That’s it! You can now provide your readers with more options while still using your eNews widget, which is hopefully styled beautifully!

Leave a Reply